Search by posts
Product category
News
 By Admin
How easy is it to set up the outdoor portable clear channel antenna?
The ease of setting up an outdoor portable clear channel antenna can vary depending on the specific model and manufacturer. Generally, these antennas are designed to be user-friendly, and the setup process typically involves the following steps:
Unpacking and Inspection: Carefully inspect the packaging for any external damages, ensuring that the box and its contents appear intact. Upon opening, meticulously check each component, examining for any visible defects, scratches, or manufacturing irregularities. Verify the inclusion of all accessories, user manuals, and supplementary materials listed in the documentation.
Assembly: Delve into the assembly process with meticulous attention to detail. Examine each component's construction, ensuring that there are no imperfections that might impact functionality. Follow the step-by-step assembly instructions provided in the user manual, paying special consideration to torque specifications and alignment requirements. Engage in a methodical assembly process to guarantee the structural integrity of the antenna.
Mounting: Select the mounting location after a thorough assessment of environmental factors. Inspect the chosen location for structural soundness, ensuring it can withstand the antenna's weight and potential wind forces. Utilize appropriate tools for the mounting process, adhering closely to any manufacturer-provided guidelines. Take into account the antenna's azimuth and elevation angles for optimal signal reception and secure it using robust hardware.
Connection: Dive into the connection phase with precision. Carefully route cables to prevent tangling and strain on connectors. Inspect the cable quality and connectors for any signs of wear or damage. Connect the antenna to your television or radio following the user manual's explicit instructions. For antennas with built-in amplifiers, ensure a seamless connection to a power source, adhering strictly to voltage and current specifications.
Orientation: Embark on a detailed exploration of the optimal orientation for signal reception. Utilize compass tools, signal strength meters, or dedicated apps to assist in determining the precise direction of broadcasting towers. Make incremental adjustments to the antenna's azimuth and elevation angles, referencing the user manual's signal alignment diagrams. Conduct multiple scans to fine-tune the orientation for maximum signal quality.
Signal Scan: Immerse yourself in the signal scanning process with a methodical approach. Initiate a thorough channel or frequency scan on your television or radio, allowing sufficient time for the device to detect and store available channels. Analyze the scan results, taking note of signal strengths, channel quality metrics, and potential interference patterns. Consider adjusting the orientation or fine-tuning parameters based on the initial scan outcomes.
Fine-Tuning: Enter the fine-tuning phase with a commitment to perfection. Implement minor adjustments to the antenna's position and orientation, carefully observing changes in signal reception. Conduct iterative scans, monitoring the impact of each adjustment on channel quality. Factor in environmental variables such as nearby structures, foliage, and atmospheric conditions. Strive for an iterative optimization process until achieving the highest possible signal quality.
Securing Cables: Conclude the setup process with a comprehensive cable management strategy. Utilize cable ties, clips, or conduit systems to secure and organize cables, mitigating the risk of entanglement or damage. Consider weatherproofing connections with appropriate sealants or protective covers, especially if the antenna is exposed to the elements. Regularly inspect cables for wear and tear, performing maintenance to uphold the long-term reliability of the entire setup.
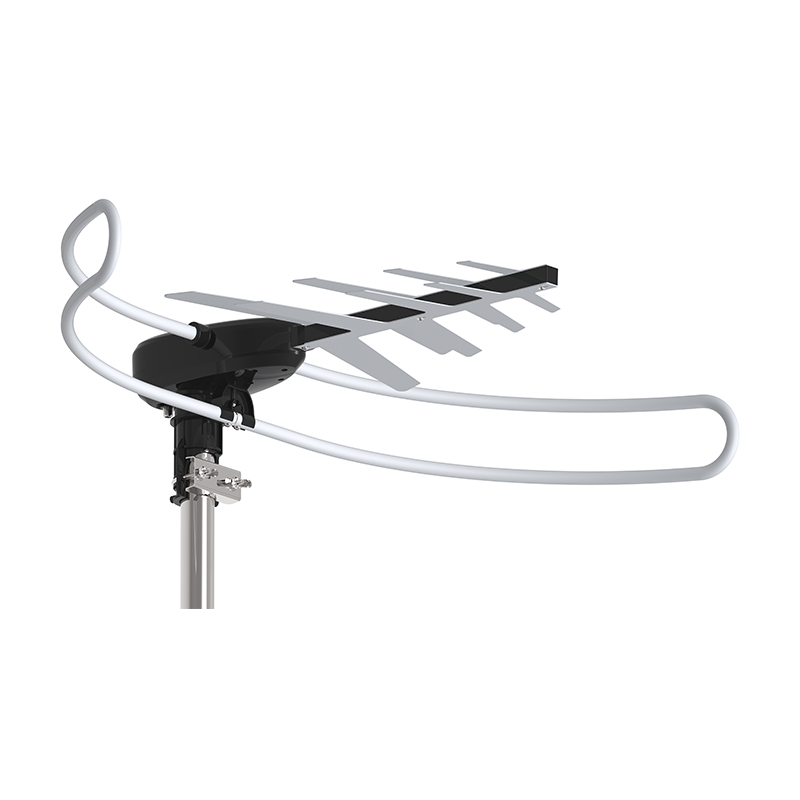
Remote controlled dvb-t outdoor portable clear channel antenna GR-980

Remote controlled dvb-t outdoor portable clear channel antenna GR-980

Recommended products
-
Omni directional TV antenna HD-119A
-
High gain amplified antenna HD-118
-
Indoor&outdoor antenna HD-120
-
Paper antenna HD-110
-
Amplified indoor antenna UR-012FA
-
Omnidirectional TV antennas UR-012B
-
Omni directional antenna UR-012C
-
Magnet indoor antenna UR-012D
-
Antenna for rca UR-312
-
HD TV indoor antenna for rca UR-312
-
Small indoor antenna HD-020S
-
HD TV digital indoor antenna RFC-02

 English
 Español


